jeep cj5 restoration guide
Restoring a Jeep CJ5 is a rewarding mix of dedication and passion, blending historical preservation with modern upgrades. This guide provides a clear path for enthusiasts, ensuring a successful project from start to finish, while honoring the vehicle’s timeless legacy as a classic off-road icon.
1.1 Understanding the Importance of Restoration
Restoring a Jeep CJ5 is more than just a project—it’s about preserving history, maintaining heritage, and breathing new life into a classic off-road icon. The process not only honors the vehicle’s legacy but also ensures its longevity for future generations. Restoration allows owners to personalize their Jeep while retaining its original charm, making it a meaningful blend of nostalgia and modern functionality. This journey fosters a deep connection with the vehicle and the off-road community, turning a vintage CJ5 into a reliable, customized ride.
1.2 Historical Background of the Jeep CJ5
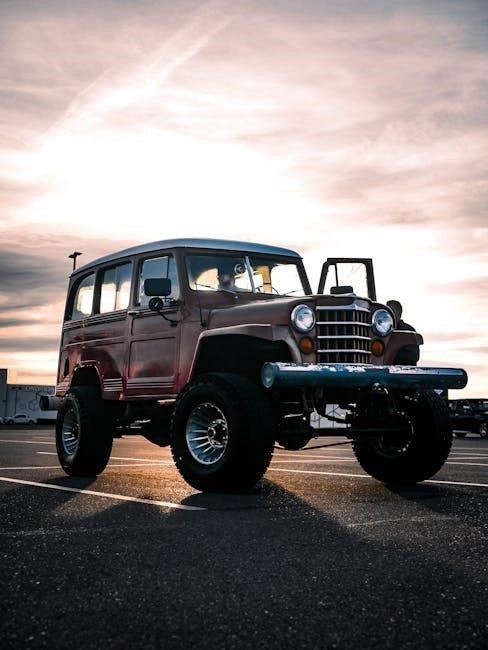
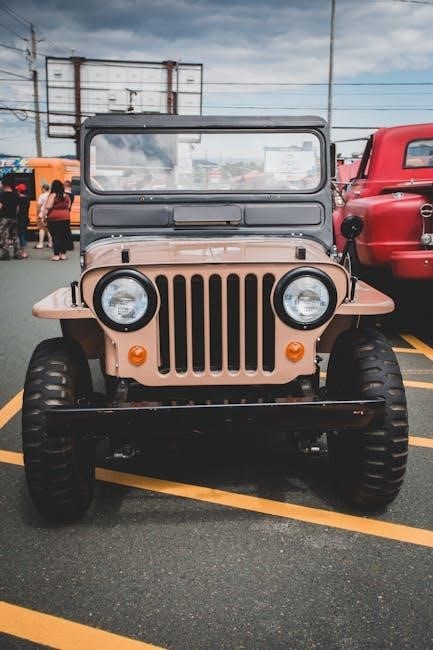
The Jeep CJ5, short for Civilian Jeep, traces its roots to the WWII-era military Jeep. Produced from 1955 to 1983, the CJ5 became a symbol of ruggedness and versatility. Designed for off-road use, it featured a lightweight, open-top design and four-wheel drive. Over the years, the CJ5 evolved with improvements in engines, transmissions, and features, making it a favorite among farmers, outdoor enthusiasts, and adventure seekers; Its enduring popularity has cemented its status as a classic off-road icon.
1.3 Setting Realistic Goals for Your Project
Setting realistic goals is crucial for a successful Jeep CJ5 restoration. Determine whether you aim for a full concours restoration, a functional driver, or a customized off-road build. Assess your budget, time, and skill level to align expectations with resources. Break the project into manageable stages to maintain progress and motivation. Consider seeking guidance from manuals or online forums to ensure clarity and avoid costly mistakes. A clear plan will help you stay focused and achieve your vision effectively.

Assessment and Planning
Thoroughly assess your Jeep CJ5’s condition, documenting every detail. Create a detailed project plan, setting priorities and timelines. Budget carefully, considering parts and tools needed for the restoration journey.
2.1 Evaluating the Current Condition of Your Jeep
Evaluating your Jeep CJ5’s condition is the first critical step in restoration. Inspect the frame for rust or damage, check the body for dents or gaps, and assess the engine, transmission, and electrical systems. Look for signs of wear in the axles, brakes, and suspension. Test all mechanical components to identify what needs repair or replacement. Use repair manuals and online forums for guidance. Document everything to create a clear checklist and prioritize repairs effectively.
2.2 Creating a Detailed Project Plan
Developing a comprehensive project plan is essential for a successful Jeep CJ5 restoration. Start by listing all necessary tasks, from disassembly to final assembly, and break them into smaller, manageable steps. Determine the sequence of tasks, ensuring logical progression, like addressing frame repairs before bodywork. Establish a realistic timeline, considering your availability and task complexity. Allocate a budget, tracking expenses with a spreadsheet. Plan for required tools and safety equipment, and document parts for easy reassembly. Regularly review and adjust the plan to accommodate unexpected challenges, ensuring flexibility and adaptability throughout the restoration journey.
2.3 Budgeting for Parts and Tools
Establishing a budget is crucial for a successful Jeep CJ5 restoration. Start by assessing the vehicle’s condition to determine necessary repairs and upgrades. Allocate funds for essential parts, such as frame components, engine rebuilds, and body panels. Consider tools and safety equipment, like wrench sets and jack stands. Prioritize spending based on importance and functionality. Research costs for OEM and aftermarket parts, and explore cost-saving options like used components or DIY solutions. Set aside a contingency fund for unexpected expenses to ensure your project stays on track financially.
Disassembly and Preparation
Disassembly and preparation are critical phases in Jeep CJ5 restoration, requiring meticulous organization and safety practices. Utilize repair manuals and online guides for a systematic approach, ensuring a smooth and successful project.
3.1 Tools and Safety Equipment Needed
Proper tools and safety gear are essential for a safe and efficient Jeep CJ5 restoration. Common tools include wrenches, screwdrivers, punches, and specialized equipment like transfer case pullers. Safety equipment such as gloves, goggles, and jack stands is crucial. A detailed repair manual or guide can help identify specific tools needed for each task. Additionally, online forums and communities often provide insights into must-have tools for a smooth restoration process. Always prioritize safety and organization when working on your Jeep CJ5. Proper preparation ensures a successful project. Use high-quality tools and follow safety protocols to avoid accidents and maintain precision in your work;
3.2 Step-by-Step Disassembly Process
Begin by removing the tub, seats, and interior components to access the chassis. Next, disconnect electrical systems and drain fluids from the engine, transmission, and axle housings. Remove the axles, suspension, and steering components, followed by the engine and transmission. Document each step and label parts for easy reassembly. Use a lift kit or jack stands for safe handling of heavy components. Follow detailed repair manuals or online guides for specific disassembly instructions tailored to your Jeep CJ5 model. Proper organization and labeling of parts ensure a smoother restoration process.
3.3 Documenting and Organizing Parts
Documenting and organizing parts is crucial for a smooth restoration process. Label and store parts in bins or bags as you disassemble the Jeep. Use a binder or digital tool to catalog each component, noting its condition and origin. Take photos of wiring and complex assemblies for reference. Keep small parts like bolts and washers in labeled containers. Store larger components in a clean, dry space. Referencing a detailed manual or guide can help ensure no parts are misplaced or forgotten during reassembly.
Frame and Body Work
Inspect the frame for damage or rust, repair or replace as needed. Address body damage, align panels, and ensure proper fitment for a sturdy, reliable foundation.
4.1 Inspecting and Repairing the Frame
Inspect the frame for rust, dents, and cracks. Sandblast to remove rust, then apply a durable coating. Replace any severely damaged sections with authentic parts. Weld repairs carefully to maintain structural integrity. Ensure alignment is precise to avoid future mechanical issues. A strong frame is crucial for the Jeep’s stability and performance, both on and off the road.
4.2 Addressing Body Damage and Rust
Identify and assess body damage, focusing on rust spots, dents, and holes; Sandblast affected areas to remove rust completely. Weld in patches or replace panels if necessary. Apply a rust-inhibiting primer before painting. For severe corrosion, consider replacing entire body sections. Use authentic Jeep CJ5 parts to maintain originality. Ensure all repairs are structurally sound to prevent future issues. Properly sealing and coating the body will protect it from further rust and extend the vehicle’s lifespan.
4.3 Realigning and Reattaching the Body
Ensure the frame is properly aligned before reattaching the body. Use jack stands or a hoist to lift and position the body accurately. Check alignment with the frame, ensuring all mounting points match up. Secure the body with original hardware or equivalent bolts. Tighten gradually to avoid misalignment. Use a torque wrench to meet specifications. Double-check all connections for stability and proper fitment. A precise reassembly ensures the Jeep’s structural integrity and improves overall performance and safety on and off the road.
Mechanical Restoration
Mechanical restoration is vital for ensuring your Jeep CJ5’s performance and reliability. This section covers engine, transmission, and axle inspections, repairs, and upgrades to get your classic running smoothly.
5.1 Engine Rebuild and Upgrade Options
Rebuilding the engine is a cornerstone of mechanical restoration, ensuring reliability and performance. Start by inspecting the block, cylinder head, and crankshaft for wear or damage; Replace piston rings, bearings, and seals to restore compression and reduce oil leakage. Consider upgrading to a more powerful engine, such as swapping the original inline-six for a V8, or installing a modern fuel-injection system for improved efficiency. Always refer to detailed repair manuals for specific steps and torque specifications. Proper assembly and tuning are crucial to avoid costly mistakes and ensure smooth operation. After completion, test the engine thoroughly before reinstalling it into the Jeep.
5.2 Transmission and Transfer Case Overhaul
Overhauling the transmission and transfer case is essential for restoring your Jeep CJ5’s drivetrain reliability. Begin by disassembling the transmission to inspect gears, bearings, and seals for wear. Replace any damaged components and reassemble using a torque wrench for precise bolt tightening. For the transfer case, focus on rebuilding or replacing the chain, gears, and bearings. Ensure proper lubrication and alignment during reinstallation. Testing the system post-repair is critical to confirm smooth operation and avoid future issues. Always consult detailed repair manuals for specific instructions and torque specifications.
5.3 Axle Replacement and Differential Repair
Replacing the axles and repairing the differential is a critical step in restoring your Jeep CJ5’s off-road capability. Inspect the axles for wear or damage, and consider upgrading to heavy-duty models for improved durability. For the differential, disassemble and clean all components, replacing bearings and seals as needed. Reassemble with fresh gear oil and ensure proper alignment. If damage is extensive, a complete axle replacement may be necessary. Always refer to detailed repair manuals for specific instructions and torque specifications to ensure a reliable rebuild.
Electrical System Restoration
Restoring the electrical system involves inspecting wiring, replacing faulty components, and ensuring proper grounding. Modern upgrades can enhance reliability while maintaining the Jeep’s classic functionality and charm.
6.1 Rewiring and Upgrading the Electrical System
Rewiring your Jeep CJ5 is a critical step in its restoration. Start by inspecting the existing wiring for damage or corrosion. Replace outdated components with modern wiring harnesses designed for durability and safety. Consider upgrading to a high-capacity alternator and circuit breakers for improved reliability. Integrate new electrical components like LED lights or a modern fuse box. Ensure all connections are secure and grounded properly. Refer to repair manuals like Moses Ludel’s guide for detailed instructions and diagrams to simplify the process and avoid common pitfalls.
6.2 Installing Modern Electrical Components
Upgrading your Jeep CJ5 with modern electrical components enhances performance and convenience. Consider installing LED lighting for improved visibility and energy efficiency. A modern stereo system with Bluetooth connectivity can provide better entertainment. Additionally, integrate accessories like USB ports, auxiliary power outlets, or a rearview camera for added functionality. Ensure all components are compatible with your Jeep’s electrical system and installed safely to prevent short circuits. This modernization blends seamlessly with the classic design, making your CJ5 more enjoyable and practical for daily use while maintaining its timeless appeal.

Interior and Exterior Detailing
Restore your Jeep CJ5’s charm by detailing its interior and exterior. Clean, refinish, and protect surfaces. Reupholster seats, refinish dashboards, and add protective coatings. Sand, paint, and polish chrome accents for a showroom shine, ensuring every detail reflects its classic heritage while maintaining durability for years to come.
7.1 Refurbishing the Interior
Refurbishing the interior of your Jeep CJ5 involves restoring seats, dashboard, and flooring to their original condition. Reupholster seats with durable, weather-resistant materials. Replace or repair the steering wheel, gauges, and controls. Clean or replace the carpeting and floor mats. Use marine-grade vinyl for seat covers to withstand outdoor exposure. Apply weather-resistant treatments to all fabrics. For a vintage look, opt for classic-style upholstery patterns. Ensure all electrical components inside are functional and securely mounted. Replace any corroded or damaged interior hardware for a polished finish.
7.2 Painting and Exterior Finishing
Painting and exterior finishing are crucial for protecting and enhancing your Jeep CJ5’s appearance. Start by sanding the body to ensure a smooth surface, then apply a high-quality primer. Choose durable, weather-resistant paint that complements the Jeep’s classic style. Apply multiple coats for consistency and finish with a clear protective layer. Consider adding a wax sealant for long-term protection. Address any rust spots with specialized treatments. Finally, reinstall exterior hardware and trim to complete the restoration, ensuring a polished and timeless look.

Final Assembly and Testing
Final assembly involves meticulously reassembling all components, ensuring proper alignment and functionality. Conduct thorough testing of mechanical and electrical systems to guarantee reliability and performance before completion.
8.1 Reassembling the Jeep
Reassembling the Jeep CJ5 requires precision and patience, following a systematic approach to ensure all components are correctly installed. Start by reattaching major parts like the engine, transmission, and axles, using your detailed project plan and repair manuals as guides. Organize all documented parts and tools, referencing your earlier inventory. Pay close attention to alignment and torque specifications, especially for critical bolts and fasteners. Double-check electrical connections and fluid systems before moving on to the final testing phase. Utilize step-by-step instructions from resources like Moses Ludel’s manual or Haynes guides to ensure accuracy. Visit online forums or communities for additional support if needed. This meticulous process ensures your Jeep operates smoothly and safely, making the restoration effort worthwhile.
8.2 Testing Mechanical and Electrical Systems
After reassembly, thoroughly test all mechanical and electrical systems to ensure proper functionality. Start with a static test: check the battery, wiring, and electrical components for connectivity and power. Turn the ignition and verify dashboard lights and gauges operate correctly. Next, start the engine and monitor for leaks or unusual noises. Test the transmission, brakes, and steering for smooth operation. Finally, conduct a test drive to assess performance under various conditions. Address any issues promptly, consulting repair manuals or online forums for troubleshooting guidance. This step ensures reliability and safety before finalizing your restoration project.
Additional Resources and Guides
Consult repair manuals like Moses Ludel’s Jeep CJ Rebuilders Manual for detailed instructions. Join online forums and communities for troubleshooting and advice. Professional mechanics can assist with complex tasks, ensuring your restoration is accurate and reliable.
9.1 Recommended Repair Manuals and Books
Essential resources include Moses Ludel’s Jeep CJ Rebuilders Manual, covering 1972-1986 models, and Haynes manuals, offering step-by-step instructions. These guides provide detailed photos, diagrams, and procedures for engine, transmission, and electrical system restoration. Additionally, How to Restore Your Jeep 1941-1986 is a comprehensive guide with color illustrations. These manuals are invaluable for both beginners and experienced restorers, ensuring accuracy and professionalism in your CJ5 restoration project.
9.2 Online Communities and Forums
Online communities and forums are invaluable for Jeep CJ5 restoration. Websites like Jeep Forum, Reddit’s r/JeepCJ, and Facebook groups dedicated to classic Jeep restorations offer extensive support. These platforms provide access to expert advice, DIY guides, and shared experiences from seasoned restorers. Engaging with these communities can help troubleshoot issues, source rare parts, and gain inspiration from others who have undertaken similar projects. Active participation in these forums can significantly enhance your restoration journey and keep you motivated throughout the process.
9.3 Professional Help When Needed
While many restoration tasks can be handled DIY, certain aspects may require professional expertise. Consulting specialists for complex engine rebuilds, advanced welding, or custom paint jobs ensures high-quality results. Local auto shops, classic car restoration services, and Jeep specialists can provide the necessary skills and tools. Don’t hesitate to seek professional help for tasks beyond your current knowledge or capabilities to maintain the integrity and value of your Jeep CJ5 restoration project and ensure long-term reliability and performance.